From The Workshop

Homeowner guides, written from the job site

Practical, straight-talking advice on the jobs we get called out for most across Stevenage and Hertfordshire, decking, roofline repairs and staircases, with real photos from real jobs.

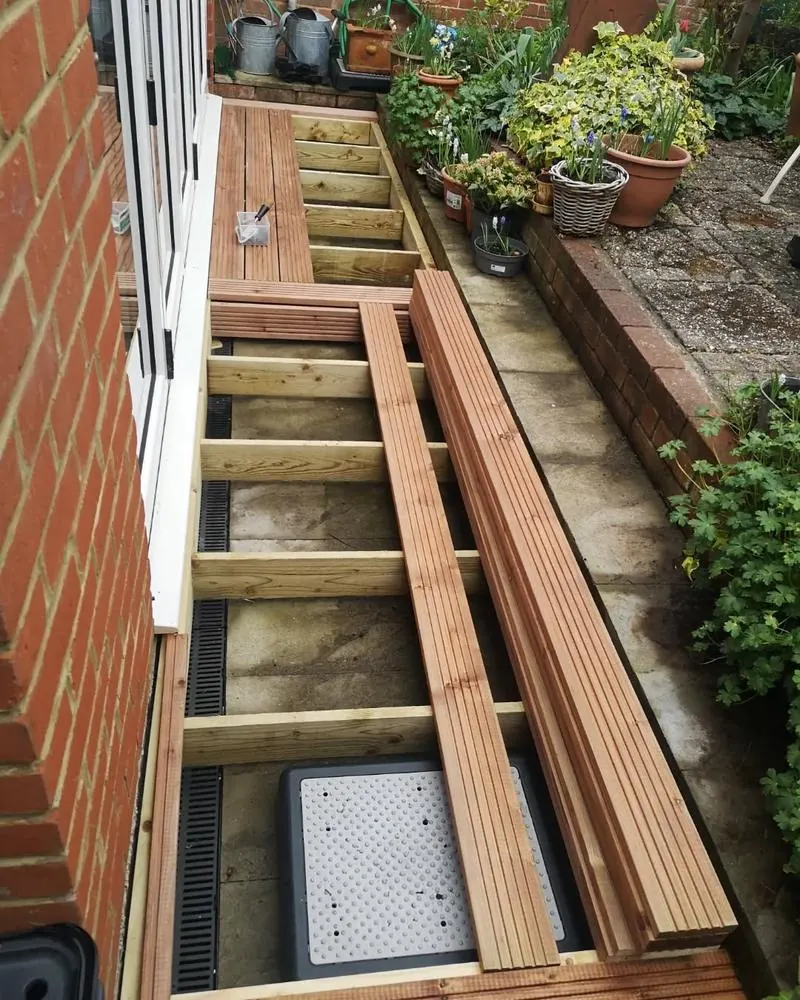
Garden decking during construction
Decking

Is it time to replace your decking?
The warning signs to look for, and how to tell a repair from a full rebuild.

Read the full guide →
Old fascia before replacement
Fascias & Guttering

The repair everyone forgets

Why the roofline is the most overlooked part of a house, until it isn't.

Read the full guide →
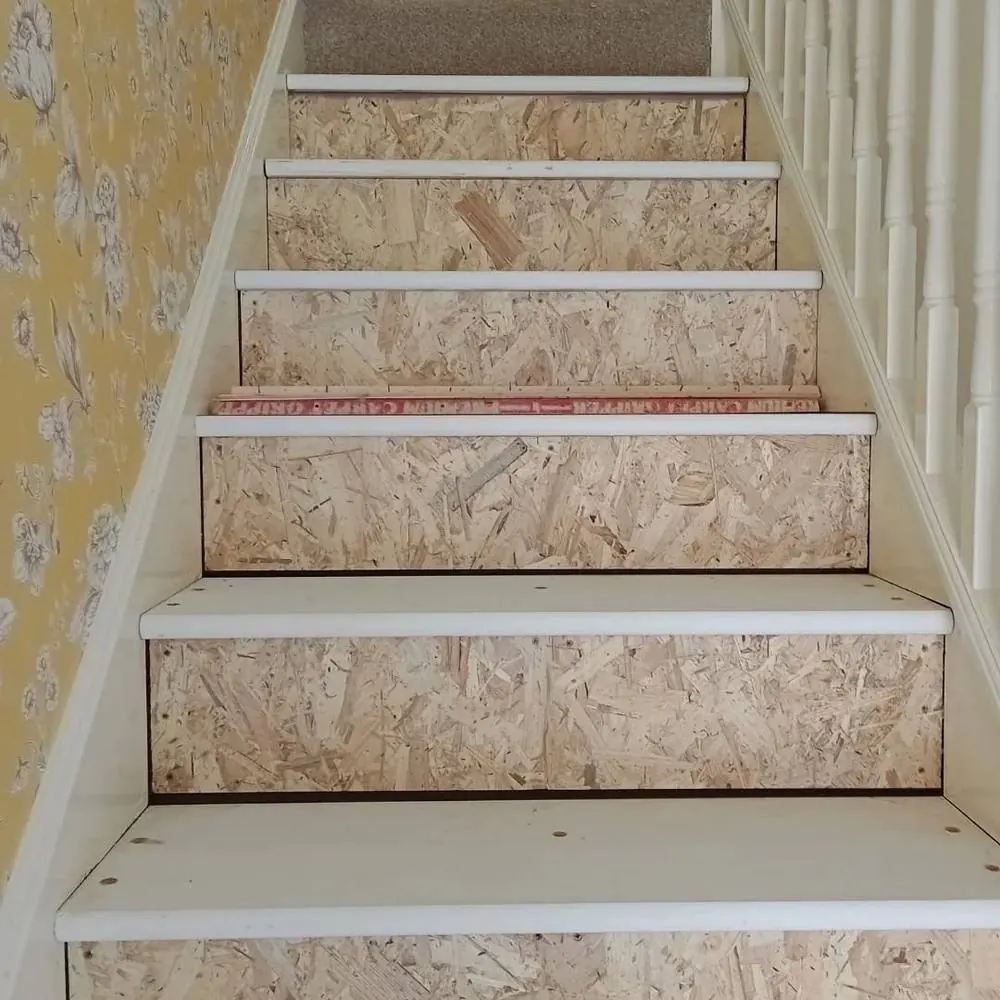
Staircase being prepped for renovation
Staircases

Planning a staircase refresh?

Every stage of a staircase renovation, from strip-back to finished carpet.

Read the full guide →
Decking

Is it time to replace your decking?

Garden decking during construction

Decking takes a battering. It's out in all weathers, it's walked on daily, and unlike a fence or a shed, it's usually load-bearing right where people stand. Most homeowners don't think about their decking until something goes wrong, a board gives way underfoot, or a section starts to feel spongy. By that point, it's often further gone than it looks.

The warning signs

  • Soft or spongy boards when you walk across them, this usually means water has got into the timber and it's starting to rot from the inside.
  • Rust-stained fixings around screws or nails, a sign the fixings themselves are corroding and losing their grip.
  • Green or black algae building up, especially in shaded corners, which makes the surface slippery as well as unsightly.
  • Gaps opening up or boards cupping, timber moves as it dries out and swells, and old decking often wasn't installed with enough of a gap to allow for that movement.
  • Visible movement in the frame when you press down near the edges or joints, this points to a problem with the joists underneath, not just the surface boards.

A quick inspection each spring, before the decking sees a full summer of use, catches most of these problems while they're still small.

Repair or full rebuild?

This comes down to what's happening underneath. If the joists and frame are still sound and it's just a handful of boards that have had it, those can usually be replaced individually without touching the rest. But if the frame itself has softened, or the damage is spread across most of the deck, patching individual boards is a false economy. It'll look fixed for a season and then the next board goes.

The only way to know for certain is to get underneath and check the joists directly, not just look at the surface.
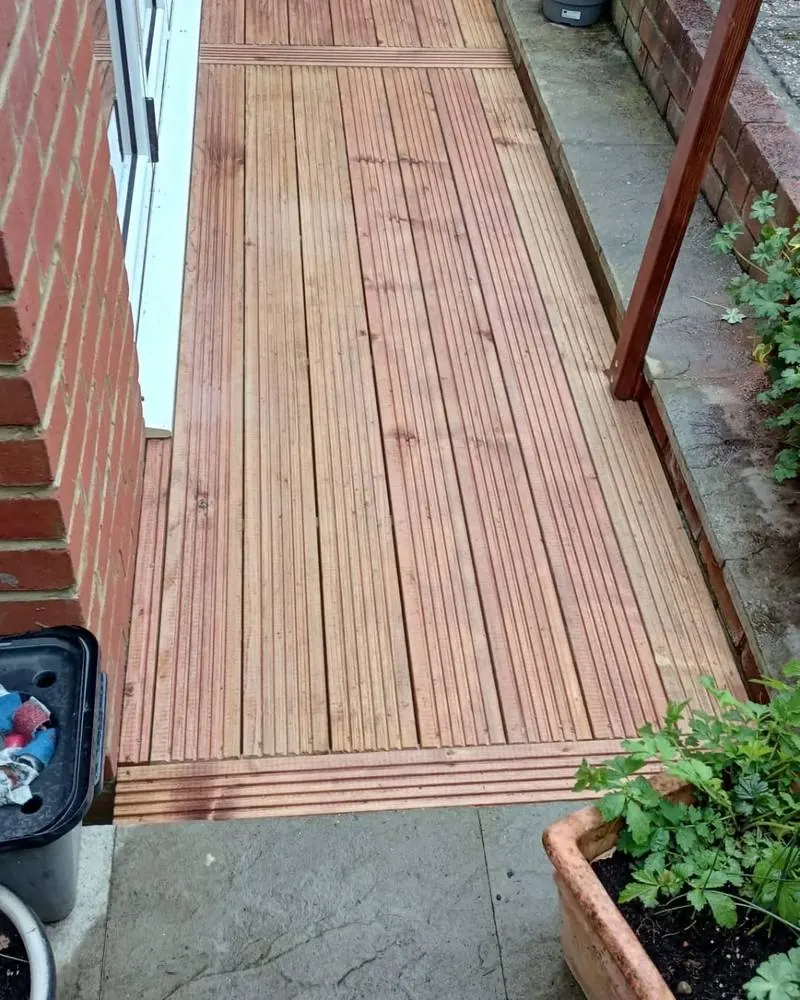
DuringDecking during rebuild, joists and new boards
AfterFinished decking, ready for the season

What a proper rebuild involves

On a full rebuild, the old boards come up entirely so the joists underneath can be checked and treated, or replaced where needed. New boards go down with a consistent gap for drainage and movement, and the edges get a proper finishing trim rather than just butting up against the patio or the wall. It's slower than a quick patch job, but it's the difference between decking that lasts a couple of seasons and decking that lasts a couple of decades.

"Once the joists are checked and sound, it's worth doing the boards properly rather than patching, it saves calling someone back out in a year."

Keeping it in good shape afterwards

  • Give it a proper clean once a year, a stiff brush and decking cleaner shifts algae before it gets a grip.
  • Re-oil or re-stain every year or two depending on exposure, it's the finish that takes the weathering, not the wood itself.
  • Keep planters and furniture legs off direct, permanent contact with the boards where you can, trapped moisture underneath is what starts most rot.

Got decking that's seen better days? Sean can take a look and tell you honestly whether it needs a repair or a rebuild.

Get A Free Quote
Fascias, Soffits & Guttering

The repair everyone forgets

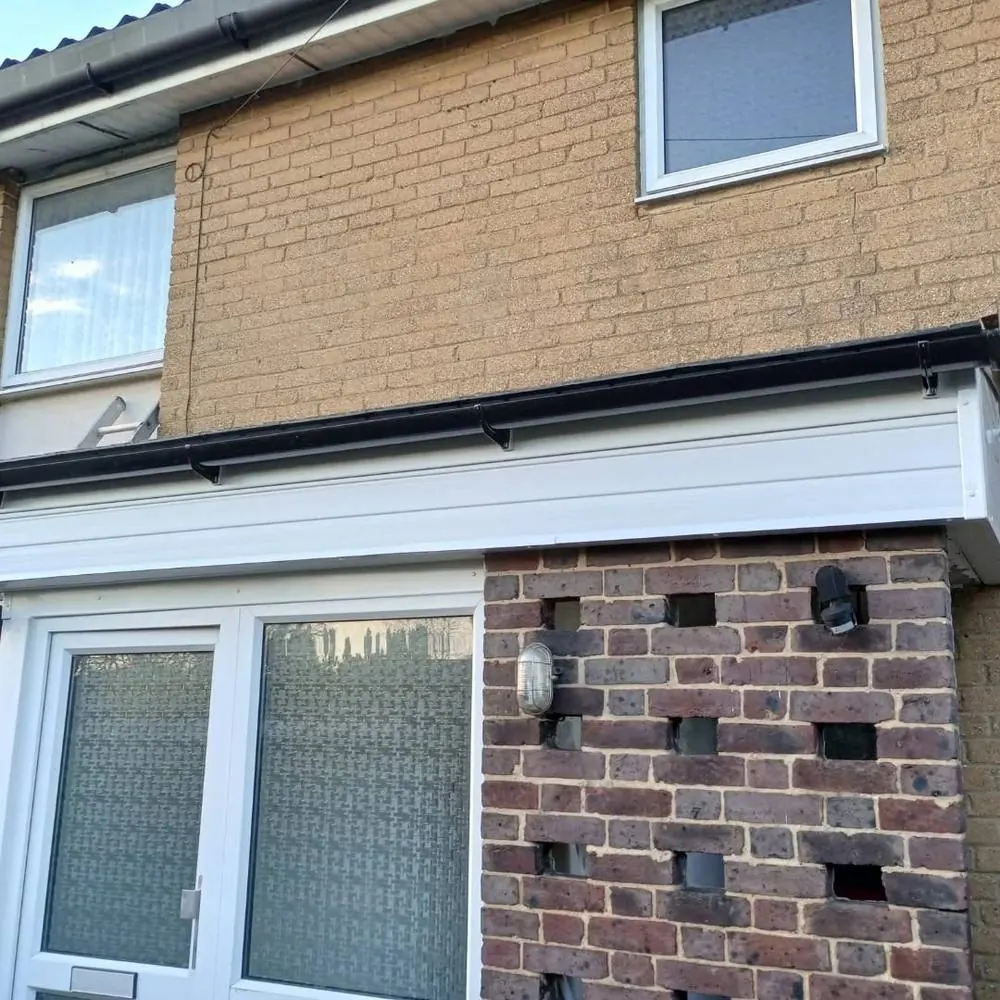
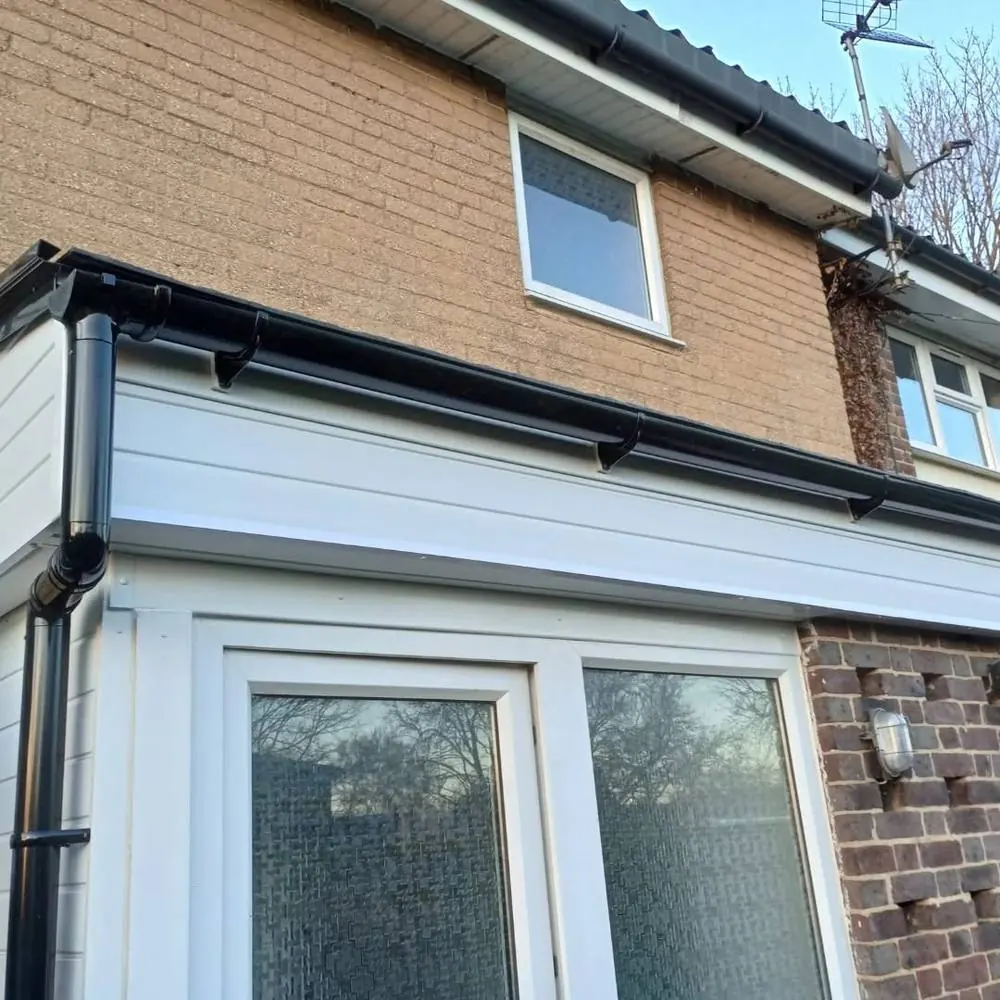
New black fascia and guttering

Nobody looks up. Fascias, soffits and guttering sit above eye level, tucked under the roofline, and most homeowners genuinely couldn't tell you what condition theirs is in. That's exactly why it's the repair that gets forgotten, right up until water starts coming through somewhere it shouldn't.

What these parts are actually doing

The fascia is the board that runs along the edge of the roof, it's what the guttering is fixed to, and it protects the ends of the roof timbers from the weather. The soffit is the panel underneath, closing off the gap between the wall and the roofline, while still letting the roof space breathe. The guttering's job is simple but critical: catch rainwater off the roof and carry it away from the walls and foundations.

When any one of these fails, the other two usually aren't far behind.

Signs it's time to look closer

  • Peeling or cracked paint on a timber fascia, once the protective coating goes, the wood underneath starts absorbing water directly.
  • Black streaks down the brickwork below the gutter line, usually means water is overshooting a blocked or sagging gutter instead of running through it.
  • Sagging sections or visible gaps where the guttering has pulled away from its brackets.
  • Damp patches appearing in the loft, especially near the eaves, this is often the first indoor sign that water has been getting in at roof level for a while.
  • Soft or crumbling timber when you press on an old fascia board, a clear sign rot has already set in.
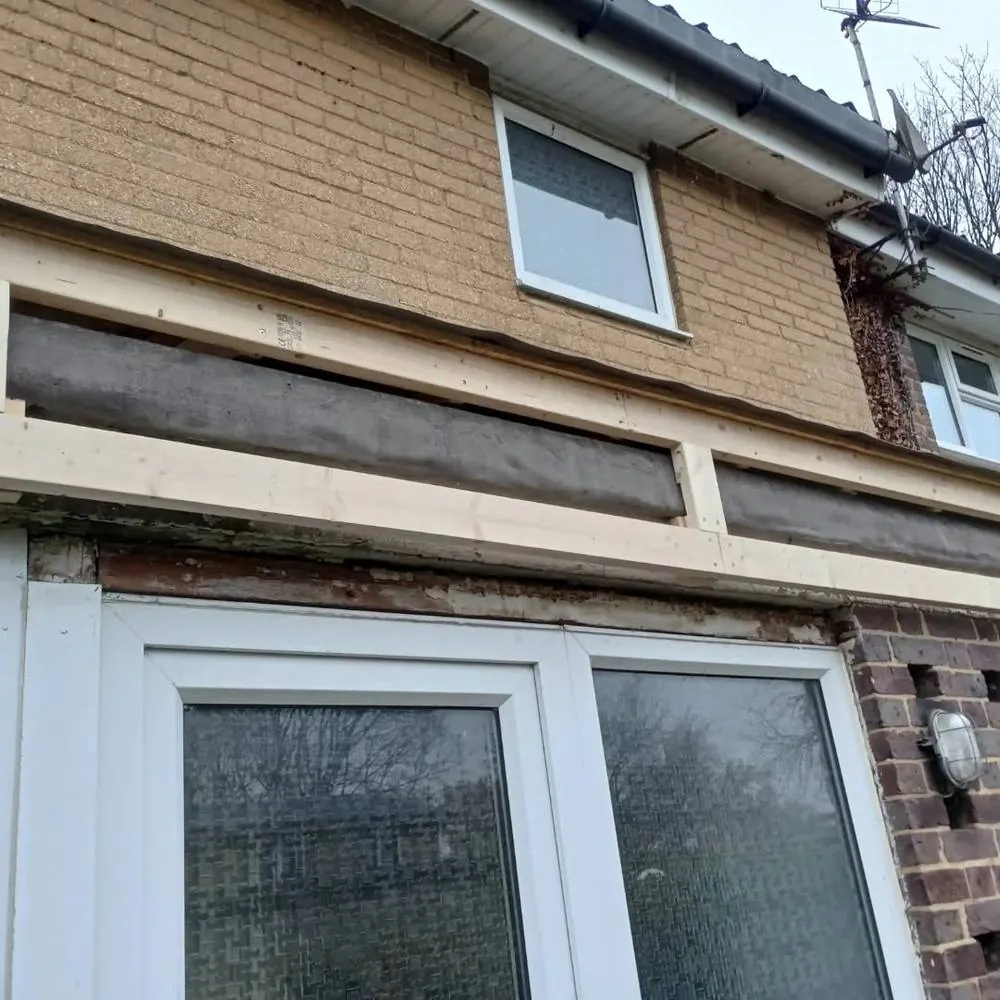
BeforeOld timber fascia stripped back before replacement
AfterNew black uPVC fascia and guttering installed

Why it's worth fixing properly, not just patching

Left alone, a failing fascia lets water track back into the roof timbers and the top of the wall itself, which is a far bigger and more expensive repair than the roofline ever was. Catching it early, replacing tired timber fascias and soffits with low-maintenance uPVC, and fitting new guttering while everything's exposed, means the whole job gets done once, properly, instead of being patched every couple of years.

BeforeOvergrown roofline before tidy up and repair
AfterTidy roofline with new fascia and guttering

Why black uPVC

It's become the go-to upgrade for a reason: it doesn't need repainting, it doesn't rot, and a black fascia and gutter line gives even an older house a sharper, more modern look against the brickwork. It's a small change that makes a bigger visual difference than most people expect.

Not sure what's going on with your roofline? Sean can take a look and tell you what actually needs doing, no upsell, just an honest assessment.

Get A Free Quote
Staircases

Planning a staircase refresh? Here's what's involved

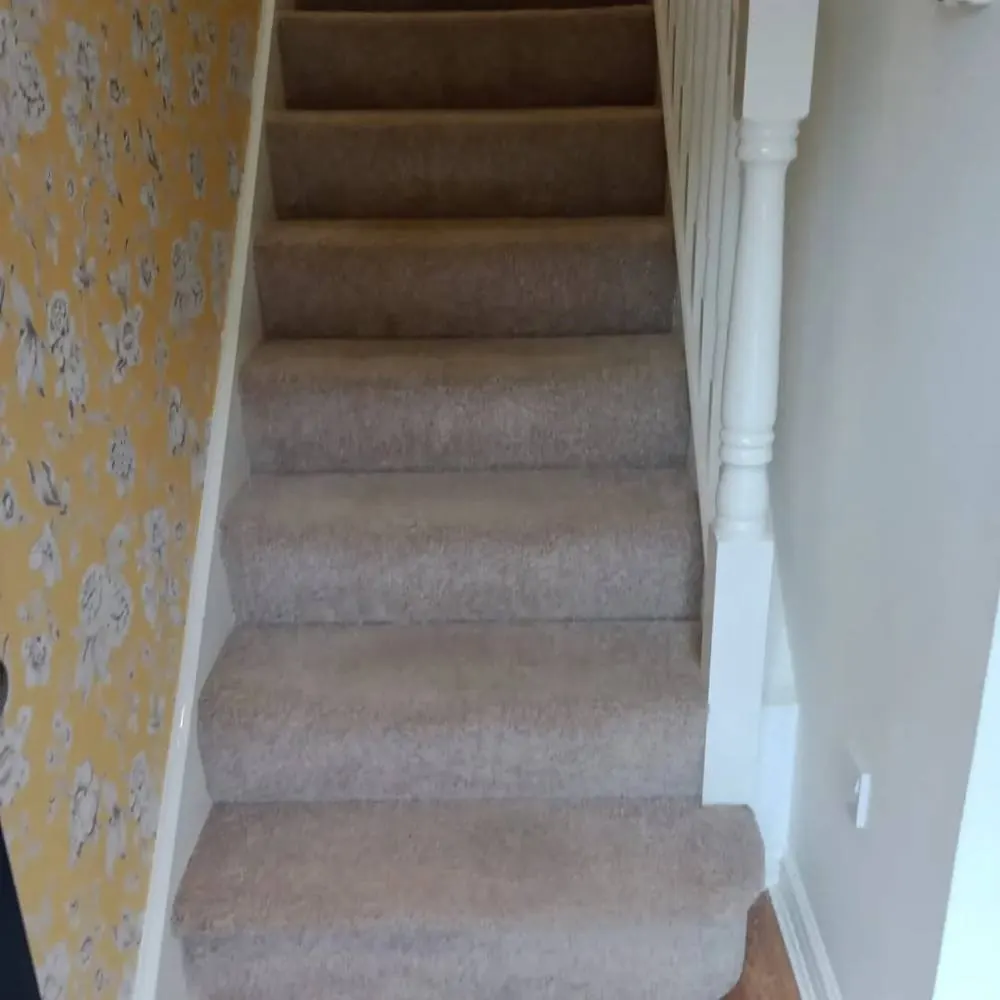
Finished carpeted staircase

A staircase gets more daily footfall than almost anything else in the house, and it shows. Worn carpet, scuffed risers, a bannister that's seen better days, it's usually the first thing people notice walking through the front door, and one of the last things they get round to fixing. A proper refresh isn't a single job, it happens in stages, and each one matters for how the finish holds up.

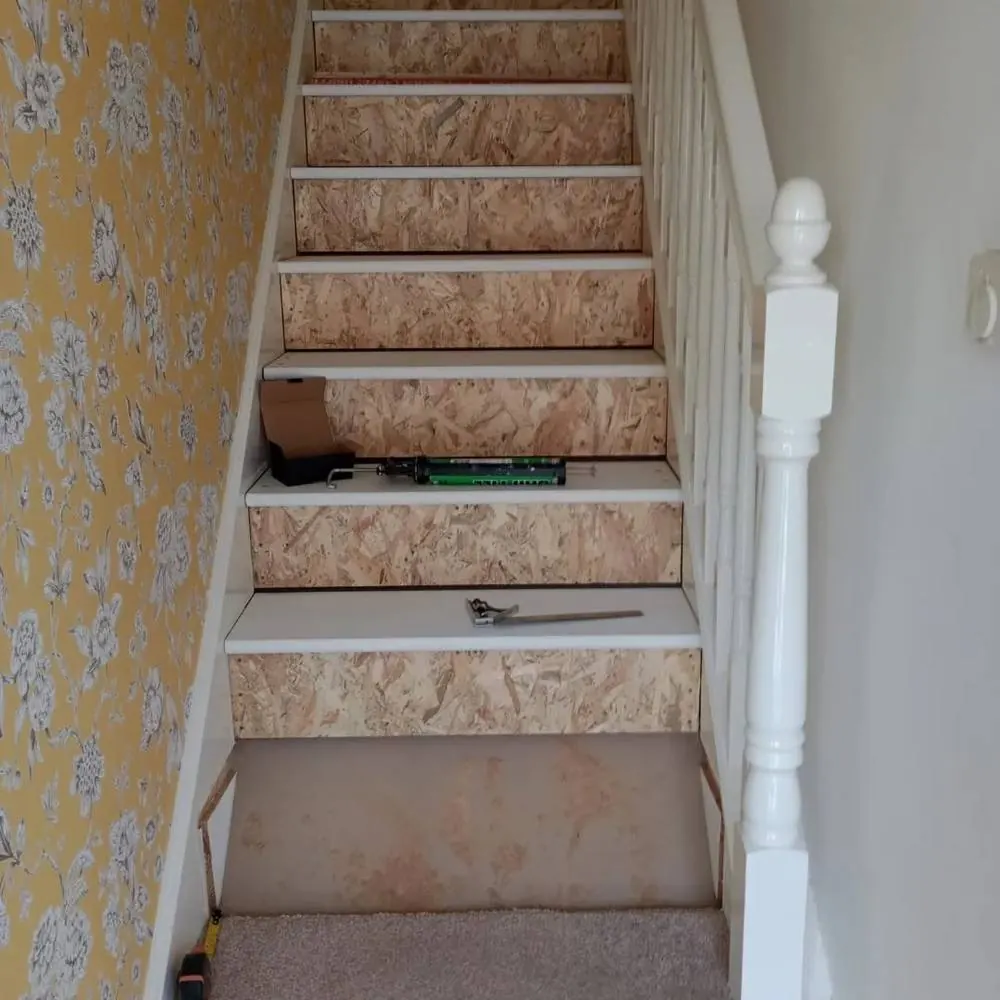
Stage 1Staircase stripped back and prepped
Stage 2Staircase risers being finished
FinishedFinished carpeted staircase

Stage 1: Strip back and inspect

The old carpet or covering comes up first, right back to the bare treads and risers. This is the point where any structural issues, a squeaky step, a loose tread, a bit of movement in the stringer, get found and dealt with. It's much easier to fix a problem here than to discover it after the new finish is already down.

Stage 2: Prep and board

Once everything's sound, the risers and treads get boarded, usually with OSB or ply, to create a clean, flat, consistent base. This stage looks rough, exposed board, tools everywhere, but it's what makes the final finish sit properly instead of showing every dip and gap in the original stairs underneath.

Stage 3: Choose the finish

This is where a staircase can go a few different directions, depending on the look and the budget:

  • New carpet throughout, the most straightforward option, and the easiest to keep clean.
  • Wallpapered risers with painted treads or a stair runner, a popular way to add some character without covering the whole staircase.
  • Painted spindles and newel posts, refreshing the bannister alongside the treads makes the biggest visual difference for the least extra work.

Stage 4: Finish and snag

Final trims, edging and paintwork go in last, along with a proper check over every step for anything that needs a final tweak before it's signed off. A good staircase job shouldn't creak, shouldn't catch a heel on an edge, and should look like it was always meant to look that way.

"Most of the work on a staircase happens before you ever see the finish, get the prep stage right and the rest looks after itself."

How long it takes depends on the size of the staircase and the finish chosen, but as a rough guide, most straightforward refreshes are a few days' work rather than weeks.

Thinking about giving your staircase a proper refresh? Sean's happy to take a look and talk through the options.

Get A Free Quote
Back to top  ·  Back to homepage